Monday, December 31, 2012

Dyeing silk scarves and wool roving with Colorhue dyes

I got a set of Colorhue dyes for Christmas. These are "instant set" dyes for silk and animal fibers. Supposedly they are very faint on cottons, so I won't bother trying that.

These are concentrated and the directions call for them to be mixed one part dye to three parts water, except black, which is to be a 1:1 ratio.  I bought some spray bottles and squirt bottles at the craft store and used my pipette to mix the dye and water.

I wrote the color names on the bottles as there are two yellows and two blues, and one of the blues looks purple when in the container.

I scrunched my silk scarf and  then put in in a ziplock bag.

 I took some of my rose color and put it in a separate container and added more water to get a pink.

I read some internet posts about using these, and one said squish it until the extra water in the bag looks fairly clear after each color. A different site seemed to add different colors before squishing. I pretty much squished each color as I went.

 After the rose color, I did an eggplant color, then the blue. Here is the finished scarf while wet.

And after drying.

I did another scarf with green, turquoise, and blue.

After drying.

I also did the same technique with some wool roving. I used one of the yellows, green, and turquoise blue.

When I took it out of the bag, there were some white spots, so I sprayed on more color (on freezer paper) 

I put it back in the bag and squished it some more. The color looks like it soaked into all the fiber, but the turquiose color became green since it mixed with the yellow.
The great thing about these dyes is they are "instant set". They do not require heat setting (iron or dryer), steaming, or a chemical to lock it in.  The material does need to be rinsed in water just to rinse out the extra dye, but that is it.

Both these scarves, and some others using a different technique, are available on my Etsy site, Ginger Wilson Studio


Sunday, December 30, 2012

Improving an existing art piece

I had some leftover white paint on my palette from my card holder project the other day. I decided to smush a piece of rice paper in it to use up the leftover paint. I wanted the white paint to be splotchy on the rice paper, as I plan to paint over it. The paint will soak into the rice paper where there isn't paint, and will be lighter where it is on top of the white paint.

This is a piece I had made at my monthly art club a few months ago.  I used white guache to paint an image. Once dry, I coated the whole page with black india ink (waterproof). When that was dry, I rinsed it with water (pouring water across the face and using a wet paper towel, not submerging it). Wherever the guache is, the black ink will wash away. Wherever there is no guache, the black ink will remain.  I should have done this on watercolor paper, but this time I used mat board.  There were places that ended up this weird gray tone. So I decided to use my painted rice paper and try to improve it.

I took my rice paper and tore it into pieces as I went. I glued them down to the left side of the picture using a mix of soft gel and fluid gel medium on the back side only. It is important not to get gel medium on the front side, as I want the paint to absorb into the rice paper in places, and the medium would prevent that. After I glued down on the pieces, I mixed ultramarine blue acrylic paint with Golden Glazing medium and some water. The glazing medium helps make the paint transparent. I added a line where the table should be and painted the lower part with more water to make it lighter. I did not add any white to my blue paint, just glazing medium and water. I used this same glaze for the coffee cup.  For the area of steam with the polka dots, I first painted the dots yellow. They were very bright and did not really look right. I mixed my glazing medium with some purple acrylic paint. I painted it over the whole area including the polka dots. It still looked very disjointed with the top portion being blue on the left and purple on the right. I then did two coats of the blue glaze over the purple to pull it together. I did a coat of watered down burnt sienna for the coffee, and called it good. I think it is a huge improvement. I really liked the texture of the painted rice paper.


card holder book finished

I have finished the card holder book. When I left off (here), I had painted some large areas of blue in the two of the corners. In order to help these blend into the white areas, I used a brayer to put white acrylic paint on one side of a plastic doily. I set the doily down on the cover and used a different brayer (with no paint on it) to smush the painted side of the doily to the cover. I did this in both corners.


I still felt it needed more, so I took a rubber stamp, applied white paint to it (I used a brush, but could have used the brayer with paint on it). I stamped it a couple of times on the cover, trying to roughly align the pattern as I went.

Closeup. You can see I added some details to the birds (wings and eyes).

I made a box for the cards from scratch using a cereal box.  This was a real pain, so I highly recommend finding a pasta, rice or similar, box that will work.  It would be a good idea to pick your box first, then pick the book you are going to use, as they need to be a similar depth.


In the mean time, I did paste down decorative paper on the interior of the book.  For the box, I used a paper decorated with white paint using a bubble technique (from my monthly art group).  I decorated it with the same bird stencil as the cover, but layered a checked stencil under it as well.

Here it is compete.

 And inside.


Wednesday, December 26, 2012

Card holder book, in progress

My mom makes beautiful cards and she sent me a bunch to use.  I had a storage book for cards, but I have now outgrown it.  I decided to make a storage book to put these new ones in.

I went to the thrift store and bought a hardcover book in a size that would be big enough.  It was 50% off day, so the book was $1.25.

I am going to remove the cover from the rest of the book.  I measure the current thickness of the pages so that I make my box the same thickness. 
Book, cereal box to make the interior box, and bird stencil


I am going to decorate the cover before dealing with the inside box I will be adding.  I used gel medium to glue down some dyed paper towels.


I drew around the outline of one row of birds. I want the birds to be the paper towel color so I will be painting around them.


I liked the way the paper towel colors seeped through the white paint so I only one coat of paint on the paper towels, I think I ended up with three coats of paint on the rest of the cover.

The title of the book was still visible so I added a section of map from an atlas over it. I then used my bird stencil to paint three birds at the top.  I added blue paint in two of the corners. I am going to ink a plastic doily and press it on top of the blue paint.  I will show the updated cover and the interior in the next couple days.


Tuesday, December 25, 2012

Art from extras and scraps

Instead of having to put away tiny scraps from projects, or throw them away, I am working on making little art pieces to use up these scraps. I basically was working on these at the same time as the card storage box. It was nice since there was a lot of drying time between layers of paint, so I could work on these while the other piece was drying. I have two canvas boards. I took the remaining dyed paper towel from the card storage box and glued them on the boards. On the one on the left, I ripped the towel into smaller pieces before attaching.

I had leftover printed text and geometric shapes on tissue paper which were leftover from my Revolution mixed media piece. I attached them next.

Since I was using stencils on the card storage box, I dug out other stencils to use on these. I used a rose/flower stencil on the smaller one. The stencil was the flower shape (solid) so in order to paint inside the flower, I had to draw around the stencil, remove it, then paint the flower interior.

This was a very large stencil. Originally I was using a fine point pen, but the texture of the canvas made the line look jagged. I switched to a bigger pen ( I believe it said it was a B). I then painted white paint over a portion of the paper towel. I really like the way the paper towel colors bleed through the paint.

I added the "RED" vinyl letters I used on the double wine bag project. I used the pen to outline the right and bottom side of the letters in black to give it dimension. I don't think either of these is complete yet. I sure I will be adding other scraps or finding something to complete them.


Double wine bag Christmas gift

Uncommon goods had these really cool wine bags that holds two bottles. Allen and I often go to the wine tasting on Friday late afternoon at B Town Liquor in Boulder and usually pick up a bottle or two. I thought this bag would be a nice gift for Allen.

I bought heavy weight canvas at the fabric store and made my bag from scratch. After buying the fabric, I saw someone else who made a copy cat bag, and they used a purchased canvas bag.  For some reason that hadn't crossed my mind and I already bought the fabric so I am still making mine. Here is the post for the other copy cat bag. Bag by infarrantly creative. Since I don't have a silhouette machine, I will be using freezer paper and stick-on letters as stencils, and using paint.

I traced a wine bottle on the back (non-shiny) side of freezer paper. I cut it out with an exacto knife as I am going to be using both parts.

I ironed on the freezer paper stencils (dull side up) to my fabric and I am painting prior to sewing the bag together. This is in case I mess up the painting part. I can always cut another piece of fabric if I make a big mistake.

I have 3" vinyl adhesive letters that I picked up at the thrift store for 50 cents. I applied the word "RED" to the open bottle. (By the way, if the freezer paper needs re-ironed on, do not iron the vinyl letters!)

I am using Setacolor transparent paint in Plum. I mixed it half and half with water.

Here I have painted the red bottle and outline painted the white bottle.

Once dry, I remove the letters and freezer paper. 

On the outlined bottle, I applied the word "WHITE" with the outer part of the letter stencils. I used some additional vinyl sticker material to create a small gap between the W and the E, and the bottle edges. When painting with stencils, it's best to put the brush on the stencil and pull the paint onto the fabric. It is less likely that paint will get under the stencil by doing this.


 Once dry, I remove the vinyl outline stickers.

I iron the fabric to set the paint.  I then sewed up my bag and it is ready to go.

Merry Christmas!

I hope everyone is having a wonderful holiday!  We got a couple inches of snow last night, so we are having a white Christmas. In typical Colorado fashion, the sun is already shining, so it will be gone in a day or two.

I got a lot of art supplies for Christmas, mainly fabric paints and dyes. Some of them I have never tried before, so I am looking forward to playing with them in the next few weeks.

Yesterday, I made the best cinnamon rolls ever, so we had the rest of those for breakfast. We plan on seeing Les Mis later today. Allen smoked a pulled pork and spare ribs this weekend so will be having that for dinner.

I hope you all have a fabulous day!

Thursday, December 20, 2012

Another experiment glueing felted wool to felted wool

I did not like the visible glue line in my second wool felt glueing experiment (which evidently I never posted about). Suffice it to say, all the full strength glues did glue the wool together, except the textile medium.

I decided to try it again with the best two adhesives from the last experiment. These are Omni-gel and Beacon felt glue. I made the felt material damp in an effort to soften the look of the glue line.

After applying the glue, I let these samples dry.  I was able to easily pull apart the wool felt that had the Beacon felt glue. The Omni-gel piece held together well. I could pull it apart, but it took a lot of effort. I still can see a glue line, but it is pretty minimal.

So I have decided to "give it a go" on the layered sweater arms. I will run it through the wash machine to get of the layers damp. I will have to "unlayer" it to apply the glue, which could be a challenge. I assume I will be
"at one" with the glue that day (i.e. be wearing it up to my elbows).  Maybe I will do it this weekend so my husband can take some pictures. Otherwise, I will have to wait for the glue and felt to dry to take any worthwhile photos,which could take a month or longer. Too bad it's not August!

Mixed media assemblage -Revolution

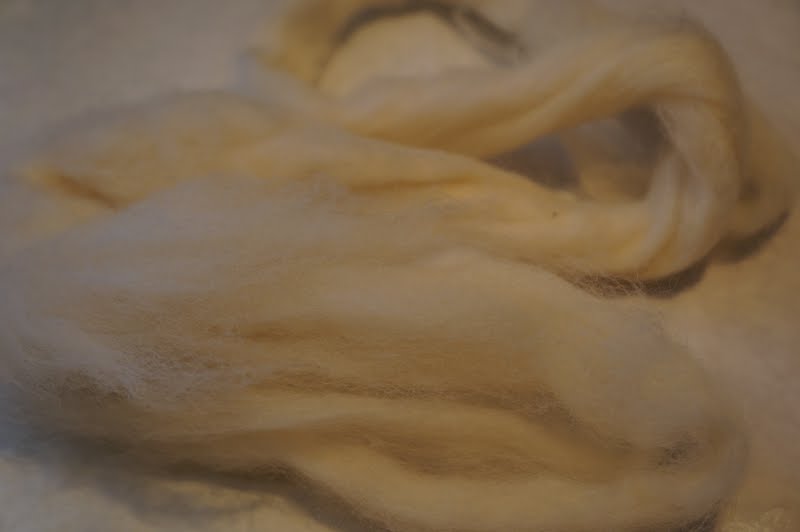
I have been working the last few days on finishing up an assemblage piece to submit into a mixed media show. I am using a niche frame with shelf I found at the thrift store, a "visible man" I bought at the Paris Street Market in Littleton, the inside part of a typewriter and some wings.

Originally I was going to make the wings from metal trims that I had.


Even though I planned to paint them white, I thought it looked more like he had a jet pack than wings. I will save them for another project.

I had bought this Apoxie Clay at a store called Collage in Portland while on vacation last year and finally tried it out. It has two parts like epoxy but has the consistency of polymer clay. I kneaded the two components together and used it to attach the typewriter part to the frame. The fame looks like it's wood on the face, but is totally infilled with styrofoam. It is very lightweight. I was worried that the typewriter part would be too heavy for it, but so far this Apoxie clay makes the connection seem totally solid.  I also was able to use two nails to attach it, and drilled two holes that I threaded wire through from the backside to help as well. The clay can be painted while it is drying so I painted it black.

My visible dude got his legs chopped off with a dremel. He has a front and a back part so I used some blue tape to hold him together while I applied a layer of rice paper. I tore it into smallish pieces (1/2" x 1") and used fluid gel medium to attach it. I mainly did one coat of paper, but if the seams were still visible, I used another layer or two.

He then got a layer of paint to make him totally opaque. I used my printer to print images onto tissue paper.  To print on the tissue paper, I used a glue stick to glue the leading edge of the tissue paper to regular copy paper. I did mangle some tissue paper in the process. I found if I glued it about a 1/2" from the edge of the copy paper, the printer had less problems grabbing it.   Inkjet ink is not waterproof, so I took it outside and gave it a coat of spray-on matte sealer and let it dry. I scanned and printed pages from a "drafting for engineers" book that I got out of the free pile at the local library. I really wanted the images to look like part of the figure, that is why I printed it on tissue paper. If I had used the book pages, they would have been too stiff and a different color from the rest of the figure.

I used the fluid matte medium to attach pieces of the torn tissue papers. I also attached some to the wings. After it dried, I thinned down some white paint to soften the images. I did use a damp paper towel to remove some of the paint, so some of the images are stronger than others.  After that was dry, I decided to apply some layers of medium to give him a faux-wax look.  I mixed 1/2 semi-gloss heavy gel with 1/2 pumice gel. I did three coats.

I had attached screws to the shelf that his legs slip over. I put caulk inside his legs to secure him in place.
I originally thought about cutting about two-thirds of his arms off. Kind of a Venus de Milo look.  I decided against it. What do you think? Would it have been more thought provoking without full arms?

The visible man came with skeleton parts too, so I am sure I will find a way to use that as well, at least for a Dia de los Muertos piece next fall, if not something before then.

P.S. Taking apart a typewriter is way harder than I thought it would be. It sat half disassembled in my garage for a couple months and I had to ask my husband to help. We got it done, but don't think I will tackle another one any time soon.