Friday, June 28, 2013

Never too early for Day of the Dead art

I wanted to do some day of the dead art, but was having a problem finding skulls and things in July. I have one styrofoam skull that I love but can't find more of them online. I went to the Halloween store down in Littleton and although they had quite a few, they weren't quite "it".  I did get one plastic one that looks like the twin of the styrofoam one, but they only had one in stock.  Sigh.

So I thought about how I could make replicas of the ones I had and found some plaster rigid wrap (woven cloth embedded with plaster) that I could use.

I took my skulls, and a couple of cheap plastic masks and covered them with cling wrap, making sure it was loose enough that it would not prevent the plaster wrap from going into the eye sockets and nose depression.

Using the package directions, I cut the plaster wrap into strips and also some smaller pieces.  I dip one piece in water, lift it up and run it between two fingers to get the plaster activated, then put it over my skull. I do this over and over, with the plaster wrap going different directions for strength. The package recommended 6 layers.I tried to make the masks look more like skulls by not covering the nose, and trying to form eye sockets, but I can't say I am all that impressed with how they turned out. After removing it from the mold, I added more plaster wrap to cover the nose hole.

Here are my results, the little guy in the middle bottom is actually a ceramic skull. I tried to sand the glossy finish off of it so I could paint it, but it wasn't working. I covered it with plaster wrap instead.

I can't say that I love the rough look of these. There are lots of bumps and ridges from the plaster wrap.  I plan to use my good friend Paperclay to help fix this.  I'll post the smooth skulls soon, but it may be after the 4th of July as I will be out of town a few days. 
After this experiment, I found a video where Dr.Kreepy uses a plastic skull and expandable foam to make a copy. I am going to try this next, but it has a 3 to 7 day drying time so it may be a week or so before I have anything to show.

Thursday, June 27, 2013

Gelli printing on fabric

Over on the blog And then we set it on fire, this month's technique is about printing on fabric with a Gelli plate. I love my gelli plate. It's easy set up, and lots of results with a few hours of work!


There are two ways that I use these plates. One is a subtractive process. This is when a base layer of paint is put down, then items are pressed into it and removed, to remove some of the paint.  The other way is an additive process.  I put down a base layer of paint, then put a different color of paint on an item and press it onto the plate. Of course, both of these techniques can be combined on one plate.  I typically use Golden acrylic paint, but also like their Open acrylics that have a slower drying time.

 On these examples, I was using plain muslin, or dyed fabrics that I thought needed some help.

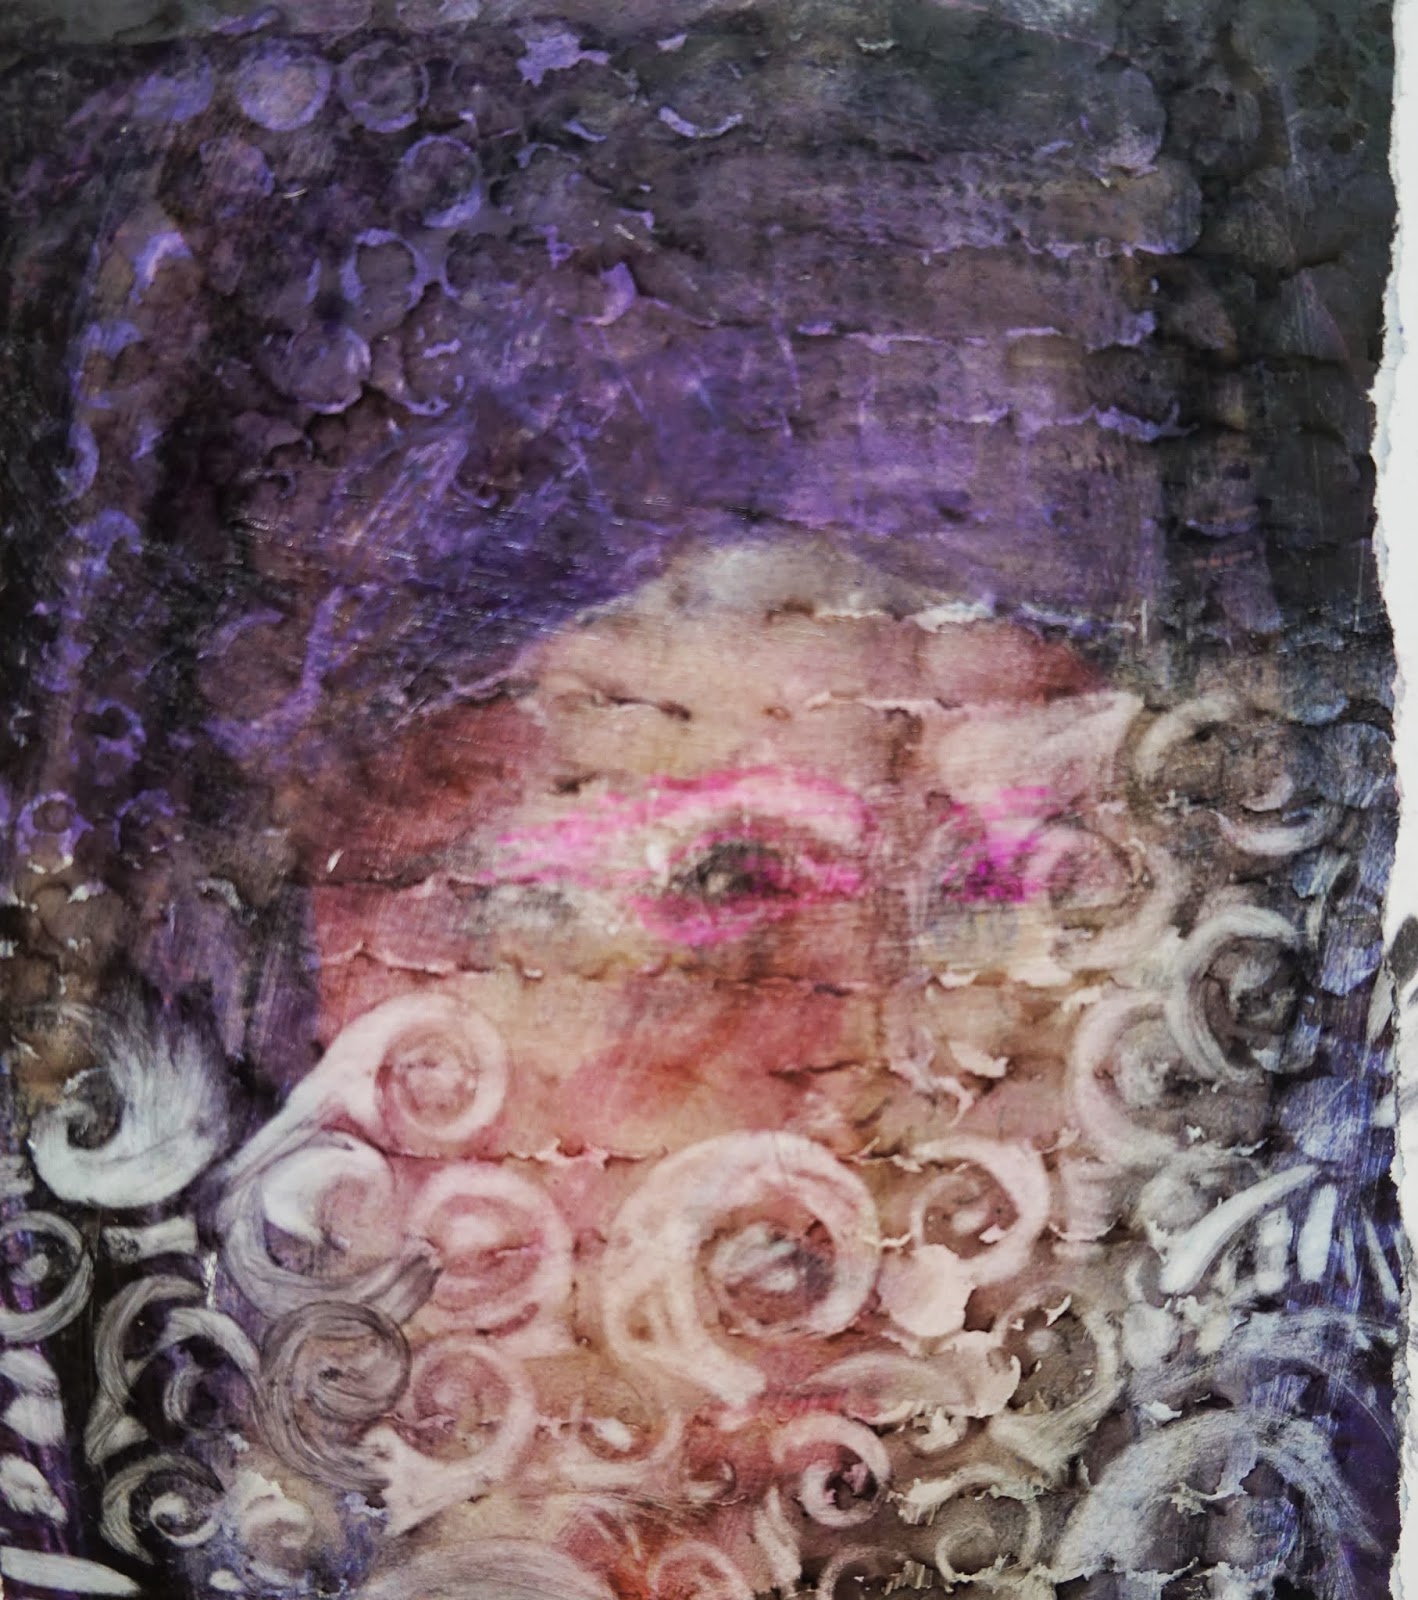
This one was dyed pink previously. My base paint must have been too dry as it did not show up. I love using an old-fashioned whisk for the circles. I think I used it on everything during this session, almost always with Quin Red paint.

This one was on a gray-blue fabric which is peeking out in the bottom left corner. This was definitely gelli printed at least twice. I always wait for the first layer to dry before adding another layer.

This one is completed covered with paint on muslin.

I think this one has three layers. The tiny red circles were made with bubble wrap

This one has a lot of layers on plain muslin. I love the hexagon shape, which is from a cookie/biscuit cutter.  I added some beading as well.


Here is my original post on making these prints, link, with my monthly art group. Other people worked on paper and there was quite a bit of variety.

Last spring I did some pieces using flowers and leaves from my garden. I used an additive process, using a brayer to apply paint to the leaves or flowers, then flipping them paint side down on the gelli plate (which already had a base layer of paint) and used a clean brayer to roll over them to transfer the paint. The flower or plant was removed before printing. Almost all the fabrics I used had been previously painted/sunprinted with Setacolor transparent paints. All of these were only printed once.

Giant leaves from a weed in my garden.
 
 The next two I used fabric silky flowers (either from the scrapbooking dept or pulled apart a fake flower stem). These are a subtractive process, using the flowers to pull the paint off the gelli plate before making the print. I love the variegated background in the first one.


These were lilacs, but I decided to make them red to contrast the blue background. I did touch this up with acrylic paint later, adding more color variation to the flowers, and added more contrast behind the leaves and stems.

More lilacs. The background design was from a plastic doily. I did add more paint to the fabric after printing, again to provide color variation in the flowers, and add a bit of detail to the background doily design. I started to stitch this one, but felt like I was making a bit of a mess, so stepped away and into the UFO pile it went.

The flower shapes at the bottom of this one are from a straw placemat (subtractive), then leaves, flowers, and circles were added (additive). The small bubble purple texture was a painted rubber stamp.


There are my experiments with Gelli printing. Hope you enjoyed it!

Thursday, June 20, 2013

Chalkboard globe

Somewhere on the internet I saw a globe that had been transformed with chalkboard paint.  I thought it looked amazingly cool so I trolled my local thrift stores and found two globes at reasonable prices.

One of them easily came free from it's metal support. The other one did not.  I sanded both globes, then wiped them with a damp rag.  (Both globes did have bumpy mountains on them, which I didn't really worry about). For the one that was loose from it's frame, I set it on a long screw supported by a brick while I spray painted it with chalkboard paint.

For the one that was stuck in it's metal support, I blue taped the heck out of it and covered the support frame with newsprint.


The paint can said to apply two coats, but I did at least three.  I made sure to flip them over so the bottom hemisphere got well covered as well. I did have some over-spray on the metal support that I thought I had blue taped so well, but it easily came off with nail polish remover.


Now I need some chalk!

Wednesday, June 19, 2013

Dyeing Rayon crochet thread

I was at Craft Scraps a few weeks ago and got some white Rayon crochet thread for dirt cheap. I thought it would be great for embroidery. I cut it into sections and mixed up some Procion MX dyes in zip lock bags.


I waited an hour than added soda ash. I also added more thread at this time, some bags got more rayon thread, and each got some mystery white yarn that appeared to be cotton. I let it sit for a few hours then rinsed them out in the sink with synthrapol and water a bunch of times.  I need to start tying my yarns and threads prior to dyeing so they don't end up a tangled mess.

Here are my end results. The center shows the white rayon that I started with. I believe my colors are (starting at the top, then clockwise): Pagoda Red, Hot Pink, Golden Yellow, Bright green, Don't remember, Lapis (I think?), and Deep Purple (I think?). 
The rayon threads that I added with the soda ash are lighter than the ones that were sitting in the dye for an hour. I love them, now I need to go embroider something!


Tuesday, June 18, 2013

Field Trip to Sante Fe, part three

Sunday we were headed back to Denver, and took the High Road to Taos first.

We stopped at the Tesuque Flea Market just north of Sante Fe. It is on Indian land and they do not allow photographs. It was a nice market for jewelry, rugs, and yard art. It did not have any of the grungy rusty bits I like or vintage doo-dads.

We stopped in Chimayo to see the church. It is known for healing and has special healing dirt which you can take with you.  They were having mass so we could not really go inside and explore.

Then we stopped to look at the church in Las Trampas. The door was padlocked so we could not go inside.

It has been probably 12 years since I visited this area. It is amazing to me how much the church in Chimayo has flourished and expanded their grounds, compared to how run down the church in Las Trampas looked.  

Scenic view from the High Road. The puffy clouds were awesome that day!

We went to Taos Peublo just north of Taos. I had to pay extra to use my camera but it was well worth it. It is a very photogenic place and it was hard to pick photos to post here. I get fry bread when I come here, it's kind of like a giant sopapilla. There are quite a few locals that sell fry bread, Navajo Tacos, or have little gift shops as a part of their home here.

 Love those clouds!


We went to lunch at Orlando's in town. It is spicy! I found it a bit too spicy, but Allen thought it was great. Then back to Denver, while I read Notorious Nineteen by Janet Evanovich and took pictures of puffy clouds out the car window.

More iDye for polyester, overdye

My dye pot always seems to boil over when I do iDyeing on the stove. We recently re-did our kitchen and now have ivory colored quartz counter tops.  I did not want to stain our new counter tops, so I evicted my stovetop dyeing to the backyard.

I bought a plug-in electric burner at Bed Bath and Beyond and plugged it in with an extension cord to an outlet in the garage.  The table I have outside is not very stable so I put it on the patio flagstone. Other than having to hold the pot when I stir (as it wants to slide off the burner) and feeling like I needed to babysit it in case a squirrel or Yeti wandered into the yard and caught on fire from the hot plate, it went well.

 
I had dyed some polyester organza and a solid poly previously, which I wanted to be red, but ended up a sad pink color. I had hoped to dye it with blue dye so it would be purple, but only had black in my stash so that is the color I used.

The best part of doing this outside is that I didn't stink up the house, this stuff smells icky.

Here is the organza. I think I put too much fabric in the pot (as usual, when will I learn?) as it still has pink spots from the previous dye job, and a nice black splotch in the middle. Overall it is gray with pinkish areas.


This is the organza in a pile, I thought it was hard to see the true color while hanging on the line.
Here is the solid polyester. It is gray with pink patches too.


It sure isn't black, and I don't mind the mottled pink spots. It is way better than the sad pink it was originally!

Painting citrasolv paper at Second Saturday club

At Second Saturday club we played with collaging and painting with Citrasolv background papers. See this link for making these papers.

Simone added doilies to what remained of Liz Taylor and painted over them.

Sue C had this lovely piece where the picture still partially remained and also had dissolved colors where a stencil had been. She also added some paint to this piece.

Another piece of Sue C's. The text was a rubber stamp.

Enid put a stencil over hers and rubbed away part of the color by using Citrasolv through the stencil, applied with a Q-tip.

This is mine. The top portion was basically untouched. The bottom part was white, so I added a horizon line and color/texture to the bottom portion.

Laurie collaged with hers.

 Sabyl collaged with hers too. I really like the white textured papers, which don't look like Citrasolv pages. I will have to ask her about those.

We had a lot of fun. I have about 4 more that I started that I need to work on! 

Monday, June 10, 2013

Making paintings from Citrasolv papers

The other day I posted how I made abstract background papers using Citrasolv and National Geographic magazines.

I took some of these papers and mounted them to a substrate. Some are on watercolor paper, some are on masonite boards, some are on canvas. I meant to photograph the pages after I painted them in the same layout as the "before" pictures, but then took the finished ones to the art fair to sell, and so I will have to do my best.

Before picture:

The original is shown in the upper right. I painted the tree trunks and branches back in where they were missing, then painted a strong horizon line and darkened the lower half around the bubbles.

This original is shown in the bottom right. It was pretty blurry with nice color and thought it looked like trees, so I painted the trunks, darkened the edge around the foliage, and added a strong horizon line.(This is in a clear sleeve so there are some reflections from the ripples in the plastic).

Before photo #2:

The original is on the upper left. The woman's image blurred and got a mottled coloring, but was fairly intact. I painted the background around her to cover the text and provide good contrast.

This is on the upper right. It had a strong horizon and I thought it looked like a snow scene so added trees and snow.

This is shown on the lower left. I added a horizon line so it would look like a lake and did a wash over the foreground to look more like grasses.

Before photo #3:

The original is shown in the lower left. The horse was very blurred from the Citrasolv process. I wanted this piece to be cheerful and added a quin violet wash for the background.

Original is on bottom middle. The tall building did not get blurred but the foreground did. I added soft trees in the foreground and added clouds and re-touched the blue sky as well.

I am still working on the others...

My friend Heidi made some Citrasolv papers with me a couple weeks ago and she is working on collaging them on flower shapes cut from wood (still in process in the picture).

I went a little crazy making Citrasolv/Natl Geographic papers a few weeks ago. I think it will take a while to use the 150 plus pages I now have!