There are two ways that I use these plates. One is a subtractive process. This is when a base layer of paint is put down, then items are pressed into it and removed, to remove some of the paint. The other way is an additive process. I put down a base layer of paint, then put a different color of paint on an item and press it onto the plate. Of course, both of these techniques can be combined on one plate. I typically use Golden acrylic paint, but also like their Open acrylics that have a slower drying time.
On these examples, I was using plain muslin, or dyed fabrics that I thought needed some help.
This one was dyed pink previously. My base paint must have been too dry as it did not show up. I love using an old-fashioned whisk for the circles. I think I used it on everything during this session, almost always with Quin Red paint.
This one was on a gray-blue fabric which is peeking out in the bottom left corner. This was definitely gelli printed at least twice. I always wait for the first layer to dry before adding another layer.
This one is completed covered with paint on muslin.
I think this one has three layers. The tiny red circles were made with bubble wrap
This one has a lot of layers on plain muslin. I love the hexagon shape, which is from a cookie/biscuit cutter. I added some beading as well.
Here is my original post on making these prints, link, with my monthly art group. Other people worked on paper and there was quite a bit of variety.
Last spring I did some pieces using flowers and leaves from my garden. I used an additive process, using a brayer to apply paint to the leaves or flowers, then flipping them paint side down on the gelli plate (which already had a base layer of paint) and used a clean brayer to roll over them to transfer the paint. The flower or plant was removed before printing. Almost all the fabrics I used had been previously painted/sunprinted with Setacolor transparent paints. All of these were only printed once.
Giant leaves from a weed in my garden.
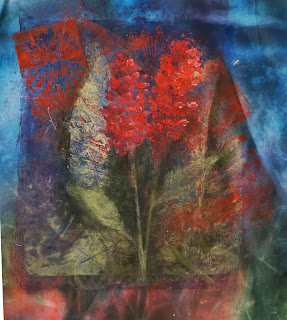
These were lilacs, but I decided to make them red to contrast the blue background. I did touch this up with acrylic paint later, adding more color variation to the flowers, and added more contrast behind the leaves and stems.
More lilacs. The background design was from a plastic doily. I did add more paint to the fabric after printing, again to provide color variation in the flowers, and add a bit of detail to the background doily design. I started to stitch this one, but felt like I was making a bit of a mess, so stepped away and into the UFO pile it went.
The flower shapes at the bottom of this one are from a straw placemat (subtractive), then leaves, flowers, and circles were added (additive). The small bubble purple texture was a painted rubber stamp.
There are my experiments with Gelli printing. Hope you enjoyed it!


 .
. 


Thanks for linking to "And Then We Set It On Fire." Great post!
ReplyDeletelove all the depth you create with your gelli
ReplyDeleteWhich textile paint/dye/medium did you use?
ReplyDelete