Tuesday, October 30, 2012

Embroidered art project

I have been posting a lot about playing with supplies lately, so today I thought I'd show a work in progress.  I really like including texture and depth with fiber, so the piece I am working on has both.

I started with a brown wool sweater that I tied balls (made from aluminum foil) into, and then felted it in the wash machine. I took the aluminum balls out and sewed in scraps of the brown sweater so they would keep their shape. I spray basted and pinned this to a piece of gold fabric and I have been hand embroidering around the balls.

 I started with a dark green thread closer to the ball and and each row is progressively lighter.

I have one more row of embroidery to do, then I will cut off the extra brown sweater fabric, exposing the gold fabric. It will basically look like a big applique. There will be other fabrics on the sides as well before I am done. I am trying to finish this for a call for entry which is due November 9th.

Marbling on fabric

I found a marbling kit at the art store the other week and thought I would give it a try. It said it was good on fabric or paper, so I am using fabric.


I am using the bottom of a broiling pan that is just used for art (I sometimes snow dye fabric on the broiler pan, since the water drips into the lower pan as it melts).

The kit comes with these paper circles that need to be pushed down to the bottom of the pan with a brush end, and when they float to the top, they are ready.  I squirt the inks on the circles, this keeps the ink from sinking to the bottom of the pan.  I used more than one circle to have more patterns. I squirted about 4 colors (sometimes repeating a color) on each dot.  I found it needs to be a healthy size squirt to have the color show up well on the fabric. Sometimes I used the circle patterns as they appeared, sometimes I ran the end of a brush through it, and sometimes I blew across the pan to get the colors to move around.


After dripping the paints.


 After a brush end is drawn through it.


 I hold the fabric in a U shape, and set the middle down first, then let the ends fall slowly to the surface.


These examples are on silk organza that I had previously done transfers on years ago. The transfers on the left are Paris metro stations, the transfer on the right was the front of a card.  I was afraid that the solvent used for the transfer would repel the ink, but they did fine.  The one on the left was the first marbleized piece I did yesterday, and it was very light because I didn't use enough ink. The one on the right was later and had more ink.


 Red and yellow ones. The red shows up as pink.  The one on the right was without moving the paint around, the one on the left I moved the paint with a brush end.

Blue and yellow/primaries. I put a lot of green in the left one but it really didn't show up.


If you look closely at the fabric samples, the color lines are rather jagged. I used a piece of newsprint to clean the ink off the water surface, and the lines and colors are much better on it.

Please note I emptied and refilled the pan about three times to get roughly 15 pieces done. The water gets dirty and I had a hard time finding the paper dots after a couple pieces. I think I accidently washed one dot down the drain that I forgot to take out of the last pan (they are reusable, good thing it came with twelve of them). The package said to rinse the extra ink off the fabric when it is removed from the pan, so I did this project right next to the sink. I put the fabric on layers of newsprint on the floor for them to dry.

I have some fun fabrics, but I think this kit would be best for paper.  

Last year or the year before, I did marbled fabric at the Art Students League with Jo Fitzell using carrageenan and Golden fluid acrylics and the results were way more spectacular. Carregeenan isn't cheap and has to be mixed up and then used within a few days. There is a lot more work involved, but the results were amazing.  She was a DVD available through Interweave Press if you are interested in learning more about marbling with Carrageenan. Here is the link for it.

Sunday, October 28, 2012

Acid Dyeing wool sweaters

I went to the Goodwill yesterday for their 50% off sale and picked up some wool sweaters for felting.  I found this huge beige cable knit sweater in the men's section. This thing was gigantic, it would have been past my knees if I tried it on. I separated the arms from the body as I wanted to dye the arms Christmas colors for a project and didn't know what I was going to do with the body yet.The tag said the sweater was hand knit, so it was fairly easy to find the mattress stitching that held the arm to the body. I did cut through the neck edge.

I used Jacquard acid dyes and used about 2 teaspoons. The red is Crimson. 


The only green I had was Chartreuse (used 2 tsp), which was a bit of a spring green so I added some Sapphire Blue (used 1/2 tsp) to darken it up.

Here are both after the dyeing is complete.  I have put them in the wash machine to felt. The colors are delicious, especially the red.


  Here they are, mostly dry.

Saturday, October 27, 2012

Painting class

Allen and I are taking a painting class at the Art Students League.  The class name is "Field Painting" but it's not limited to that. We've been to two sessions and have enjoyed both.

Here are my works in progress. I wanted this to look like receding mountains.


I painted this one as green hills and blue sky.

But like it better with a blue hills and a green sky. I thought I'd embroider white flowers and some green leaves on the blue hills.


After I am done painting for the night, I used canvas muslin scraps to soak up the remaining paint on the pallet. 


I'll show any progress on any of these in a future post.

Friday, October 26, 2012

Paint bomb painting


I saw this on the Internet months ago and have been wanting to try it.  The instructions I read used watercolors on paper, but I am using Martha Stewart acrylics on fabric.

Here are my supplies: large drop cloth, paints, small paint canisters with snap on lids, water, and alka seltzer.  I am using a natural canvas and a blue cotton twill for my fabrics.
 
I thought the acrylics were a bit thick for this project.  I filled the container about an 1/8 with paint, and another 1/8 of water and closed the container and shook it to combined. 


After that, I took one color, put half an alka seltzer in it, closed it up, shook it a bit, and set it cap down on the fabric.  The alka seltzer creates pressure and should force the bottom of the canister to pop off the top. Since I did not want to lose an eye from a flying canister bottom, I did each color separately and waited for the last one to pop before doing the next.  Some popped up a couple inches, some just barely came unattached from the top and the paint just kind of dripped out, and two popped a good six feet into the air.

For the rest, I put about 1/4 container of paint and 1/4 of water and broke the alka seltzer into small pieces when putting it in the paint.  I don't think it helped that much as I still had some that barely came unattached. I did two rounds of ten colors on each of the fabrics.

It was fun and when they flew six feet in the air it gave me a bit of a surprise. I was thinking of making these into tote bags or similar.  The alka seltzer does make the paint look grainy in places on the darker fabric, but is less noticable on the lighter one.


Thursday, October 25, 2012

Artwork on display at Bardo's Coffeehouse


I have some pieces on display at Bardo's Coffeehouse in Denver for their Halloween/Black and White show through November 12th. Here are my two skeleton quilts that are in the show and there are two mixed media pieces as well. If you are in the neighborhood (near Broadway and Alameda) please stop in and check out the show.


Sun printing before the storm

Yesterday I did some sun printing as it was in the 50's, but snow was coming later in the evening. I won't be able to do this outside again until the next warm spell.

My summer outside setup is gone, so here is my new fall setup. I love these insulation boards for painting.  See here for my "how-to's" for sun painting.


I started this one with bright yellows and fuchsia but it made my eyes hurt. I did about three coats of different colors to get to these jewel tones. It is still a bit garish.  For the sun printing, I am using leaves from my irises.  Even though the sun isn't out and it's not particularly warm out, I should still get good results.


I seem to do a lot of linear painting in my sun printing, so I purposefully did not do stripes in this one. The items for sun printing are the stalks from my irises with the leaves and withered flowers removed.


 Here are my results.  They were still a little damp when I brought them in. They were pinned to the boards so I just put the boards in the back hallway to dry completely.


They need a little something, but are a nice start.

Tuesday, October 23, 2012

Stencilling on fabric with Shiva oil sticks


I am working on a Christmas project and instead of buying holiday fabric, I am using stencils and Shiva oil sticks to create my own. 

Here is my setup. I am using a red batik fabric, instead of a solid color fabric, to add more interest.  I have this cheap plastic stencil that was in my stash.  I rub my oil stick onto some freezer paper (after removing the "skin" that covers the oil stick). I use a stencil brush to pick up the color and rub it into the stencil openings.  I go over the whole sheet once, then a second time to try to get into the details at the edges. I used a gold oil stick.


I am only doing a portion of the fabric as I am using it for a small project.
 Detail


I think it will look great in the finished project. I have to wait two days for it to dry, then I can iron it or throw it in the dryer to heat set it.

Monday, October 22, 2012

Color remover and over-dyeing

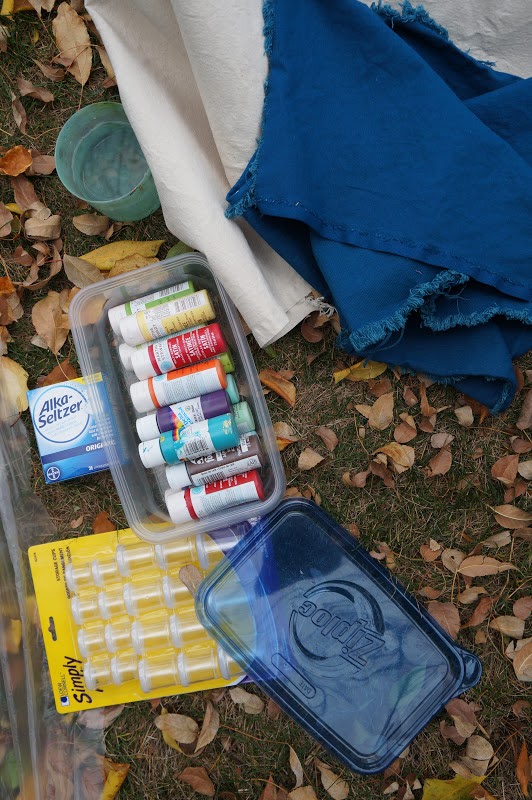
One of my favorite things to do to black fabric, or a dyed fabric that looks gross, is to use Rit color remover and then over dye. I had bought some periwinkle gauzy material and some black broadcloth fabric at the thrift store and wanted to play with them.

I wet all my fabrics first. I scrunched up half of the blue gauze and put rubber bands around it. The other half I did not scrunch and plan to dye another overall color. I scrunched some of the black pieces and accordion folded/rolled some.


In a bucket outside, I put a packet of Rit Color Remover. I boiled two big pots of water on the stove, then poured about 1 1/2 pots of hot water into the bucket. I stir the bucket, then add my fabric. I then put in a second packet of  Rit Color remover that I sprinkled on the fabric, then stirred it into the pot water. The color remover really stinks so it needs to be done outside or a well ventilated room. (Allen says it smells like someone is getting a perm).

At this point, I have two problems.

The gauzy fabric turns off-white almost immediately and I take the non-scrunched one out and put it in the washer. When it is done, I open the washer and it is blue again.  I have had this happen to be before. I think the fabric is polyester or some other non-cotton fabric. 

My next problem is, looking at the picture below, only one of the black pieces, which was a piece of black sheet and not the broadcloth I bought at the thrift store, has any color coming out of it. The thrift store black is not losing any of its color. So again, this must not be cotton. Total bummer.

Since I have a bucket of stinky color remover going, I go and get more of the black sheet material and fold and scrunch, and put in the bucket. I also add some scrunched linen pieces from my attempt at ombre dyeing.  I do add some more color remover at this point as well.  I also make a second bucket and put the pink/red velvet that I tried to Idye poly the other day. (Sometimes color leeches from fabrics in hot water and I did not want to make all the other fabrics pinkish so I did a separate bucket).
I let it sit for about an hour. I make two batches of Procion MX dye, one is Pagoda Red, the other is Lapis. I remove the fabrics from the color remover buckets, do a quick rinse under cool running water, then put the fabrics in the dye batches.

I stuck the gauzy fabrics in the dyes batches as well. I let the fabrics sit overnight and washed them all in the morning. I almost always do some shibori when I have a dye bucket going, so those results are here as well.

On the left, black sheet with color removed and over dyed Pagoda Red. On the right is shibori on white fabric (with some purple dye on it from a previous adventure), the top one was pleated prior to wrapping it to the pole.

 Detail

All these are black sheet with color removed, one scrunched, one pleated horizontally, one pleated diagonally, then dyed Lapis.
Detail

Shibori on white fabric (with some purple dye from previous experiment)

This is the gauze, a blotchy blue on the left and brown


The blue linen had very little color removed. Over dye was Pagoda Red.

The Jade Green had more color removed and was over dyed Lapis. I must have scrunched these too hard as very little dye got to the interior.

Here is the velvet, it was once pink and had some kind of flower or leaf pattern in a darker pink. The pattern is gone. The color is nice but there is a weird greenish spot about 10" in size. I don't know why it's a different color.


I love the blue over dyed fabrics. I have an issue with reds. I have yet to find a red dye that I really like. Most of the fabrics I have dyed red look unappealing. The pagoda red is more like a rust on these fabrics, which is nice, but not quite what I wanted. Does any one know a good red dye to try?