Showing posts with label Colorhue dyes. Show all posts

Monday, November 4, 2013

Handweavers Guild of Boulder Annual Show and Sale

This past weekend I went to this sale in Longmont. Due to the giant flood we had months ago, they had to move their sale from the Boulder County Fairgrounds to an empty store space in the local mall.

They have a ton of handmade/hand dyed items, from dyed silk scarves, to woven reed baskets to hand felted items. And of course woven scarves and jackets and rugs. I always enjoy looking at all the lovely things.


I love Heide Murray's needle felted minis. They are adorable. She teaches needle felting classes in the Longmont/Boulder area and I keep meaning to take one of her classes.


 I loved Suzzanne McGuirk's felt steampunk sculptures.


They did have some dyed wool roving, but I didn't see anything I had to have in that department.

But I do love curly wool, and I can't find it very often. They had blue and a super bright yellow, which I bought, but passed on the dark red and dark green.

But how much bright yellow do I really need? I took out my Colorhue dyes and dyed some of it orange and some lime green.  Curly wool makes me happy!

Wednesday, October 9, 2013

Making soy silk papers, and other fiber papers

This past weekend I made a lot of dyed soy silk and wool roving. I also have dyed nylon, bamboo, and tencel fibers in my stash that I had previously dyed. I wanted to try my hand at making soy silk papers.  I wanted to make wispy light soy silk papers. I also wanted to see if I could make wool roving papers that looked wet felted. I love how they all turned out.

Here is the start of the wool roving paper, the bottom layer was mostly soy silk.

Then I added wool roving, curly wool, nylon, and angelina fibers on top.

This is my try at wispy soy silk paper. It has some bamboo, tencel, silk, and angelina fibers as well.

I didn't take pictures of the other two pieces with the fibers laid out.

There is a towel and clear plastic protecting my table top.  The fibers are laid out on fine tulle and then another piece of tulle is placed on top. I then used a paint brush to apply hot soapy water (1/4 to 1/2 tsp hand dish washing detergent to 2 cups) to the fibers.  I don't want them swimming in water, I just want the fibers to be wet. Once the front looks good, I flip it over and do the back. (My instructions said wait 2 to 4 hours to make sure the fibers are saturated, but I don't think that is necessary. I did wait a bit, then continued). It seems most of the instructions I saw used Jo Sonja's Textile Medium, which I didn't have on hand. I used Golden's GAC 900 Textile medium.  I applied it with a brush, just on one side per the instructions I was using.  It worked really well. I think next time I will blot the fibers with a towel to remove some of the excess water first. Also, I think I would apply the medium to both sides, especially on the wool one.  I took them outside and hung them on a clothesline to dry (Put them in a plastic tub or similar to carry them outside, as mine were very drippy). Hopefully my shrubs and grass by the clothesline don't mine a coat of textile medium!  Once dry, I take the tulle off.  I need to iron all of them, but here are pictures of them un-ironed.

I didn't take a picture of laying out the fibers on this one.  This is all real silk, laid out in two layers and is very solid. I wanted to have a "control sample" of fiber paper made exactly per the instructions, but wish I would have made it wispy.

Somewhat wispy, this is miscellaneous fibers (bamboo, tencel, soy silk). The purply rectangular bits at the bottom are silk throwster's waste that I bought pre-dyed from Wild Heathers (I bought it at a fabric convention, but I'm sure they have a website, and they also have a store now near the Denver Art Museum).

This is the piece that I did show the fiber layout above.  This is some silk, tencel, bamboo, and soy silk. I love the wispy open look of this (although the colors don't blend as well as I hoped).


This is the wool/ soy silk piece. I really like both sides so I think I will play with this some more.

Wool Side:


Soy Silk Side:


I plan to try to make wool paper that looks like my wet felted landscapes. This is a much quicker and easier way to create a felted looking piece.  The wool piece isn't completely glued through, it seems like I could pull it apart into two layers (which could be interesting in itself), so I am going to wet it and apply textile medium again to hopefully create a better bond.


Monday, October 7, 2013

Dyeing soy silk (and some wool)

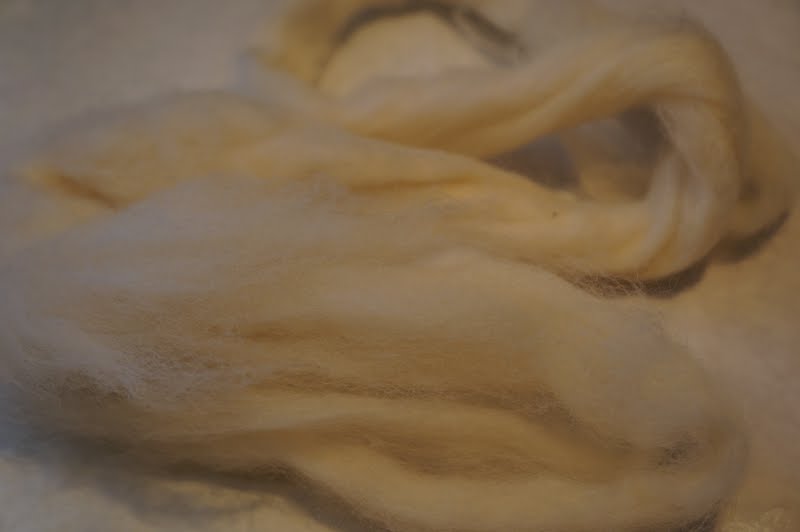
I wanted to make some "soy silk paper", sometimes called "silk fusion" and bought some white soy silk fiber at Fancy Tiger in Denver.  I wanted to try dyeing it.  Looking on the Internet, it says to consider soy silk like a protein fiber, like wool, not a plant fiber, like cotton.

Since I had experimented with dyeing fibers before, see links below, I thought I would try Kool Aid dyeing and Color Hue dyeing the soy silk.

Links to previous experiments:
     See here  for wool roving dyeing (and silk scarf dyeing) with Color Hue dye
     See here for bamboo dyeing with Rit dyes
     See here for bamboo dyeing with Procion MX dyes
     See here for Nylon dyeing with Kool aid
     See here for Tencel dyeing with Rit dyes

First I tried the Kool Aid dyeing. No fiber is safe when I am doing experiments so some wool and wool/silk blend roving also get in the dye. I also found a package of wavy wool I bought at a garage sale.

Fibers from left to right, soy silk, wool/silk blend, two types of wool (Merino and Brown? that is what is on the receipt, I bought these a while ago), and the wavy wool. I used 3 to 4 packets of Kool Aid for each batch. Please note that the Kool Aid is the color in the cup that Punchy is holding on the front of the package, not the color of the package itself. I had four purple packages that I thought were all grape, and it turned out I had two grape (purple) but two were some other flavor that was actually a gross red color. I didn't realize this until I had already stirred them all up in water and basically got maroon.
 I soak my fibers in water to help absorption and squeeze all the water out before putting it in the dye batch.

I mix my Kool Aid packets in a microwavable container with about a cup and a half of water. I pour a little vinegar on the fibers before they go in. Kool Aid is supposed to be "acid enough" without the vinegar, but it doesn't hurt.

Shove 'em in. Stir 'em a bit. I nuke it in the microwave for 2 minutes (lightly covered). I let it rest for at least 10 minutes. Sometimes that is enough for the fibers to take all the dye. The water should be clear or a cloudy white when all the dye is absorbed.  If there is still dye in the water, it can be nuked some more, but be careful as I don't think the soy silk likes the heat.  Nuke one more minute if necessary, and let it sit until cool.(Microwaves vary so I take no responsibility if you have problems or issues related to microwave dyeing.)

Here are my fibers cooling down. I don't want to rinse them while they are hot, as the wool may felt due to the quick temperature change. After they cool, I will rinse them well in cool water. If I feel they still have a lot of dye in them, I will let them sit in 2" of water in the sink, squeezing the fibers and changing the water every so often. The maroon took a ton of work to rinse out. 


While they are cooling, I am going to set up my other dyes.  These are Color Hue dyes and I got the sample set last Christmas. I have only seen these for sale on the Internet, and am pretty sure my set came from Dharma Trading. These are concentrated dyes, and I already have some mixed with water in small squirt and spray bottles.

I set up seven sandwich ziplock baggies and seven sets of fiber. Again, I wet my fibers before putting them in the baggies. I leave the fibers a little wet as this will help the dyes move through the fibers. These are considered instant set dyes, so after I add the dye (a healthy squirt into the baggie), I squeeze the bottom of the baggie with one hand, making sure the dyes don't try to escape at the top. If there are any white areas left on the fiber, I add more dye. I sometimes will squirt one color at one end and another color at the other to get a variegated color. The water is supposed to be clear when the dye is absorbed, but my water is never clear. I let them sit in their baggies for a few hours, squeezing occasionally. I then poured any remaining colored dye water into a large ziplock bag with some damp silk fabric since I didn't want the dye to go to waste (I had 3 silks each in a large baggy, one each for yellow/green, blue, and red dyes).


 Per the directions, after dyeing with Color Hues, I just need to rinse out the extra dye and then let them air dry.  I had issues with a previous batch, so I actually took these out of their baggies and let them air dry without rinsing then first. When they were dry I rinsed them, then let them air dry again.

Here is a picture of both the Kool Aid and the Color Hue dyed fibers.

Here are just the soy silks.  The ones on the left are Kool Aid dyed and they became curly/frizzy from the heat. The Color Hue ones still have smooth fibers. I did have problems with the soy silk not being completely dyed throughout. When I loosen the fibers, there are white patches that didn't get dyed. In the future I will spread the fibers before putting it in the baggy or container with the dyes.


 Soy silk: Color Hue dyed on the left, Kool Aid/microwave dyed on the right.

Next time, making fiber papers!

Wednesday, February 27, 2013

First attempt at Nuno felting

Earlier this month I had bought a bag of silk scraps and wanted to try Nuno felting (combining wool roving with silk fabric).

I kind of "winged it" and so the results are not spectacular.  First, I decided to cut silk circles. I did not think the wool roving would be able to penetrate two layers of silk.  I wanted the background to be wrinkled, so I pinned the fabric with wrinkles, outlined around my circles and then cut the background fabric.  (I took the pins out before putting the wool roving down).

I did not find a background fabric in the bag of scraps that would work, so I used Colorhue dyes to dye a piece of white silk orange.  I dried it with a hairdryer, rinsed it with water and a little soap multiple times, and dried it with the hairdryer again. Colorhue dyes are supposed to "instant set" but I must not have gotten all the extra dye out. As you can see, my mainly white circles in the top photo become orange after wet felting (see photo wayyy below).

I put wool roving around the circles,a fairly heavy application. I did a light application of roving over the background as I am looking for that bubbly fabric I have seen with nuno felting.

 The piece is on bubble wrap. I put a piece of tulle mesh over the piece, and I used some soapy water to wet the fibers. I rubbed gently with my fingers, then used my plastic roller to help with the felting


I wrapped it around a pool noodle and rolled and rolled and rolled.  Seriously, and rolled and rolled and rolled. Multiple directions, many times.

The wool around the circles seems felted but it is not penetrating through the silk. I think the silk is too thick a weave to allow the wool to get through. Also, I did not put any wool roving on the backside and that may have helped.

To try to save this piece, I gently rinsed some of the soap out. I am going to let it dry, then I am going to attack it with my felting machine. If I can get the wool fibers to embed in the silk, I may re-wet it and try to full it and get the wrinkly bubbly fabric I am hoping for.

I will try this again, but next time will use silk organza and wool roving on both sides. And maybe watch some more YouTube videos (I watched one when I knew it was not working right and would have at least done roving on both sides had I watched it before jumping in). If anyone has advice, please let me know.

Monday, December 31, 2012

Dyeing silk scarves and wool roving with Colorhue dyes

I got a set of Colorhue dyes for Christmas. These are "instant set" dyes for silk and animal fibers. Supposedly they are very faint on cottons, so I won't bother trying that.

These are concentrated and the directions call for them to be mixed one part dye to three parts water, except black, which is to be a 1:1 ratio.  I bought some spray bottles and squirt bottles at the craft store and used my pipette to mix the dye and water.

I wrote the color names on the bottles as there are two yellows and two blues, and one of the blues looks purple when in the container.

I scrunched my silk scarf and  then put in in a ziplock bag.

 I took some of my rose color and put it in a separate container and added more water to get a pink.

I read some internet posts about using these, and one said squish it until the extra water in the bag looks fairly clear after each color. A different site seemed to add different colors before squishing. I pretty much squished each color as I went.

 After the rose color, I did an eggplant color, then the blue. Here is the finished scarf while wet.

And after drying.

I did another scarf with green, turquoise, and blue.

After drying.

I also did the same technique with some wool roving. I used one of the yellows, green, and turquoise blue.

When I took it out of the bag, there were some white spots, so I sprayed on more color (on freezer paper) 

I put it back in the bag and squished it some more. The color looks like it soaked into all the fiber, but the turquiose color became green since it mixed with the yellow.
The great thing about these dyes is they are "instant set". They do not require heat setting (iron or dryer), steaming, or a chemical to lock it in.  The material does need to be rinsed in water just to rinse out the extra dye, but that is it.

Both these scarves, and some others using a different technique, are available on my Etsy site, Ginger Wilson Studio