Monday, April 25, 2016

Fabric tree collages

A while ago I had made a layered piece with gelli printed interfacing as a top layer, which I then melted portions away.  You can see that post here.

I thought I would try this with a tree image I have been working on, and use free-motion stitching instead of hand embroidery. Here you can see the different components. I have a painted canvas for the background. The leaf canopy and tree were fabrics I painted in a Jason Pollen workshop a few weeks ago. The interfacing layer is a gelli print I made a while ago. I used fusible web to iron down the yellow tree canopy fabric. I won't iron down the tree trunk until I have finished with the interfacing layer. 

When I put the interfacing over the yellow fabric, I am pretty sad that my painted fabric is pretty much hidden. Next time I would probably just grab a fabric from my stash and not use something I hand painted.  I then took this "sandwich" to my sewing machine and free-motion stitched on it.

What I learned as I went along:
  1. The interfacing melts a lot better if the free-motion stitching is fairly open. Tight stitching really prevents it from melting.
  2. If I cut slits in the interfacing where I want it to melt away, it does help. I just used a seam ripper. I wanted to make sure it melted where I have sky openings in the tree canopy.
  3. Sew right along the outside edge if you don't want the background fabric visible around all the edges. 
  4. Use lightweight interfacing. The heavy stuff does not like to melt and is some places the edges looked light brown/slightly toasted. 
Remember to always work in a well-ventilated area and wear a mask to block any fumes.

As you can see I played tree trunk swap and decided to use this magenta/purple one instead of the red one shown in the previous picture, since the gelli-printed interfacing had a touch of purple.

And here are a bunch more. This one has the heavy interfacing.


I did free-motion stitch around the trees and branches after I ironed the tree trucks down.  I really like the following two where I used colorful thread for this, instead of dark gray.

This one was the first one I stitched the interfacing on. I did the stitching very close together, so the interfacing did not melt much.


I love how they turned out, although there were a lot of steps and work involved.  I did use my Scan'n'cut to cut the tree canopies, but hand cut the tree trunks. These are roughly 8" x 10". I think I will work on a larger one next!


Monday, April 18, 2016

Finnabair classes

The week before last, I took some classes with Finnabair at Imagine That in Columbus, NE. I was thrilled that an internationally known instructor came to Nebraska.  I was also thrilled that my sister decided to visit and attend some of the classes as well.
Myself, Finnabair, and my sister Cinda
My friend Karen, from Denver, also came to Nebraska for these classes. It was great to see her as we haven't had a chance to hang out for quite some time.


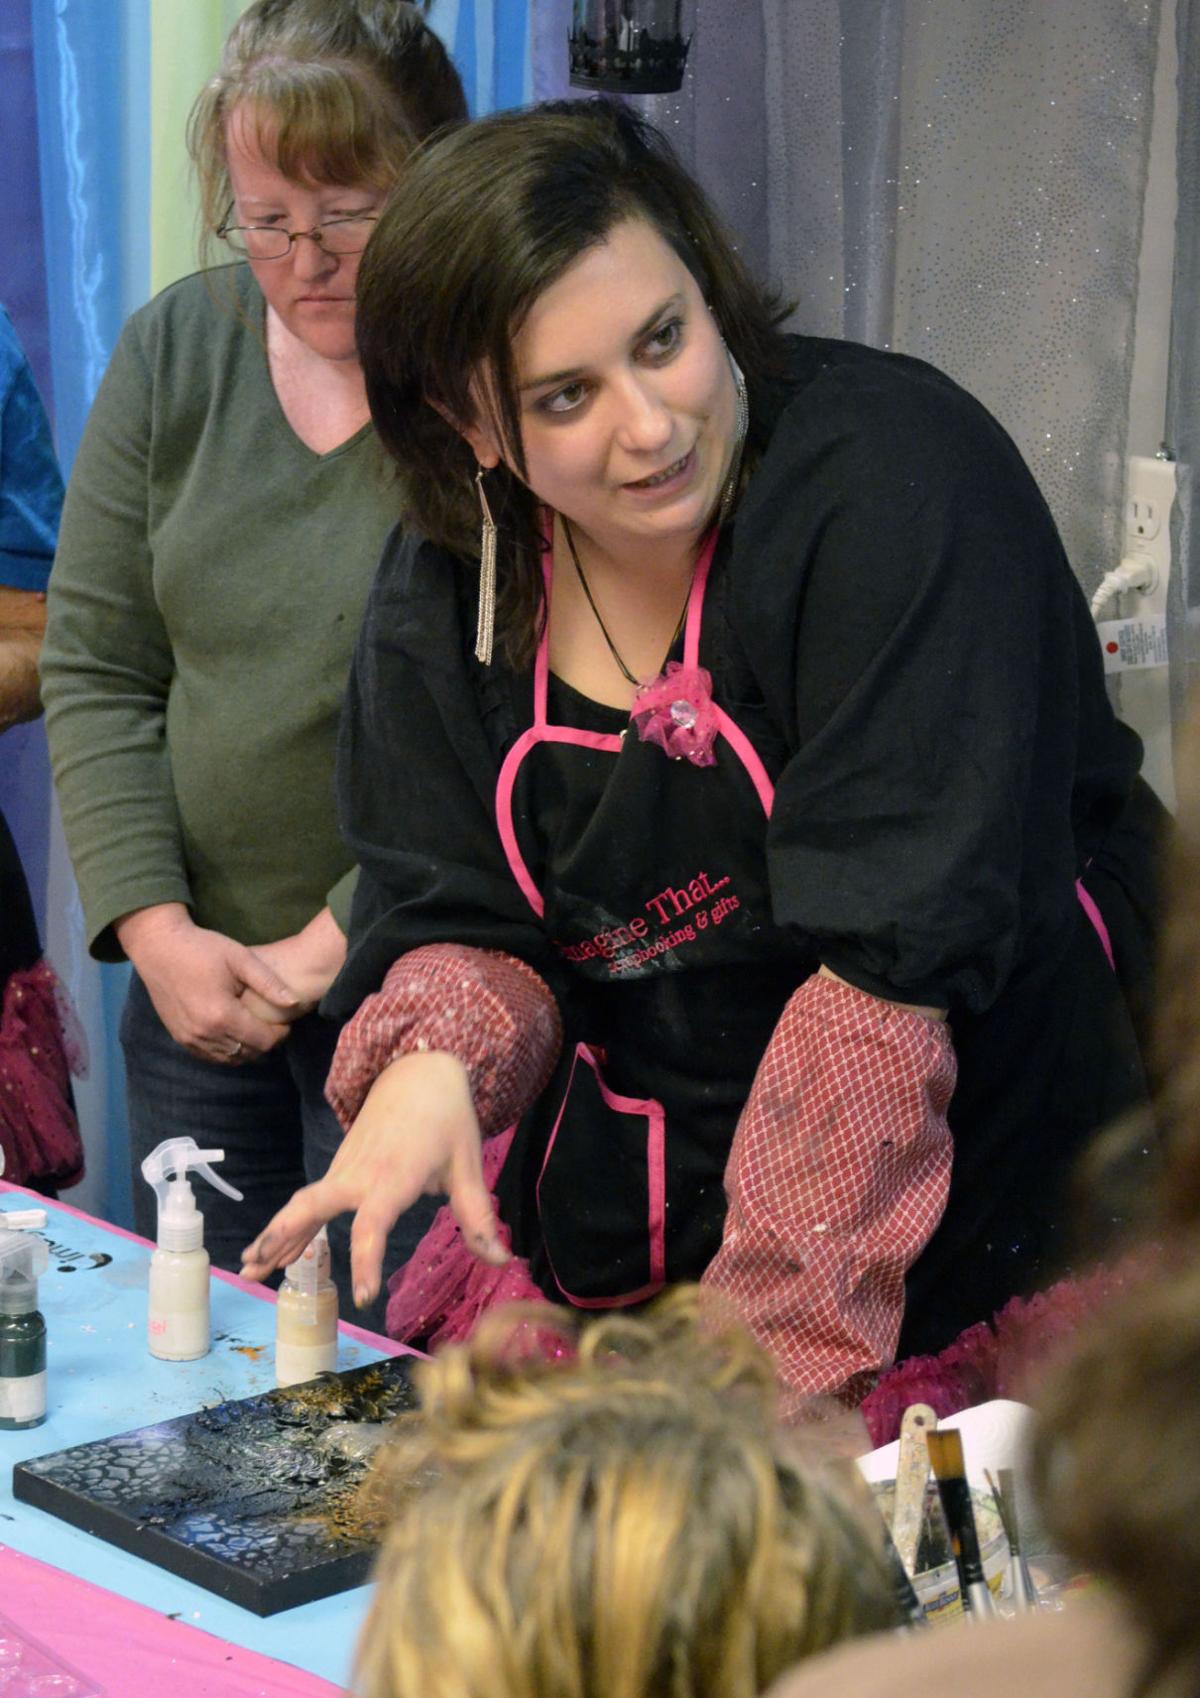
Finnabair demoing
My finished piece
My sister's finished piece

My piece from class two (it needs a bit of work still)

Cinda's piece from class two

There was an article in the local paper about Finnabair's visit and classes, here is a link.  I was in the background of the photo they included in the article. Art is very serious...
ImagineThat Guest


After class, my sister and I both worked on some other pieces in Imagine That's cropping room, and then some more at home.

Here is Cinda's piece.
 

And here is my piece.

I did not include any progress photos of these pieces, since the techniques are Finnabair's and teaching them is how she makes a living. I highly recommend taking a class from her, she really keeps everyone on track so you can finish the projects in class.


Thursday, April 7, 2016

Hand sculpture with nails

A few weeks ago, on this post, I showed some fabric that I had stamped with washers.  I used one of those fabrics to make a hand sculpture.


I love how it turned out, but all the sewing had to be done by hand, so it was very time-consuming.  I had glued the nails to the fabric, thinking my sewing machine foot would be able to somehow sew over them, and it just did not turn out the way. If I make another one similar to this, I would sew the hand first and leave openings for the nails to be inserted through.

I am working on a series of hand sculptures to include in the Summer Art Market in Denver in June, so I will be posting some others in the future!

Monday, March 7, 2016

Fabric stamped with washers

I wanted to make some fabric with circle designs, but did not want to use stencils.

I decided to create my own stamps using washers and corks.   I glued the washer to the cork with E6000, so it would be easier to stamp with it. I made two different sizes.

Here is the smaller "stamp". I plan to make one of my hand sculptures out of this one.  I used my gelli plate as a palette to put my paint on and spread it out with a brayer. Then I stamped into the paint, then on the fabric.  I was using a Cotton Twill, and next time I will used a standard cotton, as the texture of the twill weave did affect the stamping.  I was going for a grungy imperfect look so I was happy with the results.  This one was with black and brown paints, although it is more black than brown.


This is the larger washer stamp. It is probably 2" in diameter.  I used red, yellow, a couple blues, and a brown paint to stamp these. This picture shows it laying across and hanging down from my dining table. It's a fairly large piece of fabric and was made for a specific project (still in it's early stages).

 And a close up. You can see the color variations and texture. It looks a bit rough up-close, but I like it that way. And from far away, it is uber-fantastic and exactly what I wanted.

Monday, February 29, 2016

Hand sculptures


I had been struggling with how to accomplish the art I wanted to make, using a hand shape as the focus.  I was thinking I would do some on fabric and some of paper, but I wanted them to be at least slightly three dimensional. First I though I would make a hand outline out of metal wire and then attach the fabric or paper to it. My first wire hand shape was too stiff and wouldn't make the curves correctly. The 2nd one was too flimsy and would not hold it's shape.  I did try try cutting a hand shape out of matboard. It was tough on my hands and it took a long time to cut just one.  I felt very stuck for weeks and then had this hand-smack-forehead moment, when I figured out that I could make it even more three dimensional if I did it the same way I made my cat sculpture.

Here is my cat sculpture. I made it a few years ago and had planned to make more, but then moved on to other projects. (I just realized I never posted this on my blog previously. I was going to submit it to a craft magazine, but never did).


I only wanted a basic hand shape so it could be two pieces of fabric. I had a hand shape I had been using for the wire, so I just used that for my first try. And here is the lovely claw hand that is my first attempt.

Surprisingly, attempt two was almost perfect. I decided I didn't like the machine stitching to make the fingers, so I did hand stitching for my new ones.

I meant to take a picture of these final ones when they were still white, but I forgot. So here is an unfinished one in blue, just to show the shape.

Here is the first finished piece. I have ideas for a bunch of these, including some with free-motion stitching, some with 3D items attached.  I plan to make some stamped fabrics, and use some hand-dyed fabrics, some felt, etc for some of the others as well. The hand shape turned out very nice, although there are a few things I will tweak in the next set.

Monday, February 22, 2016

Snow dyed fabrics

We had a big snow storm a few weeks ago, so that meant a bit of snow dyeing was in order.

I did not iron these prior to photographing them.

This was folded in half and put on a PVC pole and scrunched, like for shibori. Then I laid the pipe flat on my rack, for snow, then sprinkled powdered Procion dye.

I used hotel key cards clamped to either side of a folded piece of fabric.

I used empty yogurt cups and rubberbanded the fabric on them. I was hoping the circles would be more distinct.

The rest were just scrunched and layered "parfait" style with snow and powdered dyes in big buckets.


There were quite a few more small ones. I bought a bunch of linen and cotton napkins at the thrift store a while ago, so threw a bunch of them in as well.

I am working on some new mixed media pieces and hope to have at least one finished so I can post pictures next week.

Friday, January 22, 2016

Gelli print collaged deer head

I bought a paper mache deer head at Hobby Lobby in the spring. I have a farm/western themed bathroom and thought it would be fun.

I decided to collage gelli prints on it, because I have a ton of gelli prints. I gessoed it first, before collaging, since many of my prints are on translucent deli paper. I had no idea that collaging this would take so long. I got about halfway done back in May, then it got shoved in the closet for a while. I pulled it out a few weeks ago and got it finished. 


I love the flowers on his cheeks.