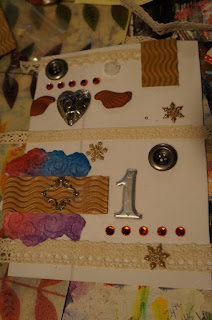
I used craft foam as my base, and embellished it with buttons, lace, corrugated cardboard, etc.
My collagraph plate with everything glued down, I let the glue dry overnight.
I repainted it and ran it again with rubber mats covering the whole underside.
I made another plate that I will use to demo applying the paint at the Second Saturday meeting. (O darn, "Merry" is going to be backwards on the print!!! Those letters are double sided, maybe I can pull them off and re-glue?)
I do not think I will use craft foam as the base at our meeting. It makes the glue dry very slowly. Also, some of the embellishments pressed almost all the way through it, which could have damaged my rubber mats. So I need to change the way I put the layers together for the press or use a different base, I will probably do both.


Hey Ginger,
ReplyDeleteThese look like a lot of fun! The list of textures and things to try goes on and on. Are you thinking about fabric too?
Sabyl