Tuesday, February 17, 2015

Dyeing wool with food coloring

 I have some wool. Okay I have 16 ounces of wool, and it is white.  Time for some dyeing! I think I sometimes like dyeing things as much as I like creating things.


I am using McCormick food colorings as my dye.  I soaked my wool in water, then in a water/vinegar mixture. I am dyeing eight pieces of roving that are about 1 ounce each.


I used the microwave method, 2 minutes in the microwave, 5 minutes rest. I did this rotation quite a few times. The color is supposed to get completely absorbed by the wool and that did not happen. I rinsed them a few times and they were still not colorfast.  I ended up putting them in a vinegar water solution and that solved the problem and the water remained clear. I do not think I let the roving soak long enough in the vinegar water during the first soak.

After dyeing these, I was reading online that some of the food colors may not be light fast.  So I plan to do a light fast test on these before putting them in a final project. But they will be fun to play with in my felting class samples. 

Monday, February 16, 2015

Experiments in wet felting

I am taking a 6 week online felting course with Fiona Duthie.  I am almost caught up for the week 1 samples.

Each time I finished a sample, I thought of a similar, but different, one that I wanted to try.  But I am getting very behind already and we are only in week 2.

Here are my week one experiments.

Silk on merino.

The yellow and blue are silk (noil?) on green merino.  I hate the green and the silk looks pretty sad, so plan on over-dyeing this.

Alpaca on merino. My alpaca has a bit of vegetation in it, which drives me crazy.

The alpaca has an interesting feel to it and a soft halo.

Merino on Jacob.

 Merino on Corriedale

Nuno felting silk fabrics

Pleated silks on merino.
Detail.


I better get working on week 2!

Monday, February 9, 2015

Felted Cuffs and felt baubles

A few months ago (I am very late in posting this), I decided to do some felting experiments.

I thought all my felting supplies were in one large tub and it wouldn't be too big a deal to pull them out for a felt day. Two large tubs, one small tub, and multiple bags later, I had most of my supplies, although there are still a few things missing that are still in moving boxes.

I wanted to make some wrist warmers/cuffs, and also play with doing some three dimensional felting. I thought I'd make the cuffs by nuno felting with silk fabric.
The silk I used was too tightly woven and the wool did not felt into it, so I will need add some free motion stitching for the fabric to stay in place.  I did do some additional felting of the cuffs after this picture.

The blue and red piece is my first piece with resists.  It's not too bad for a first effort, but there is a lot of room for improvement.

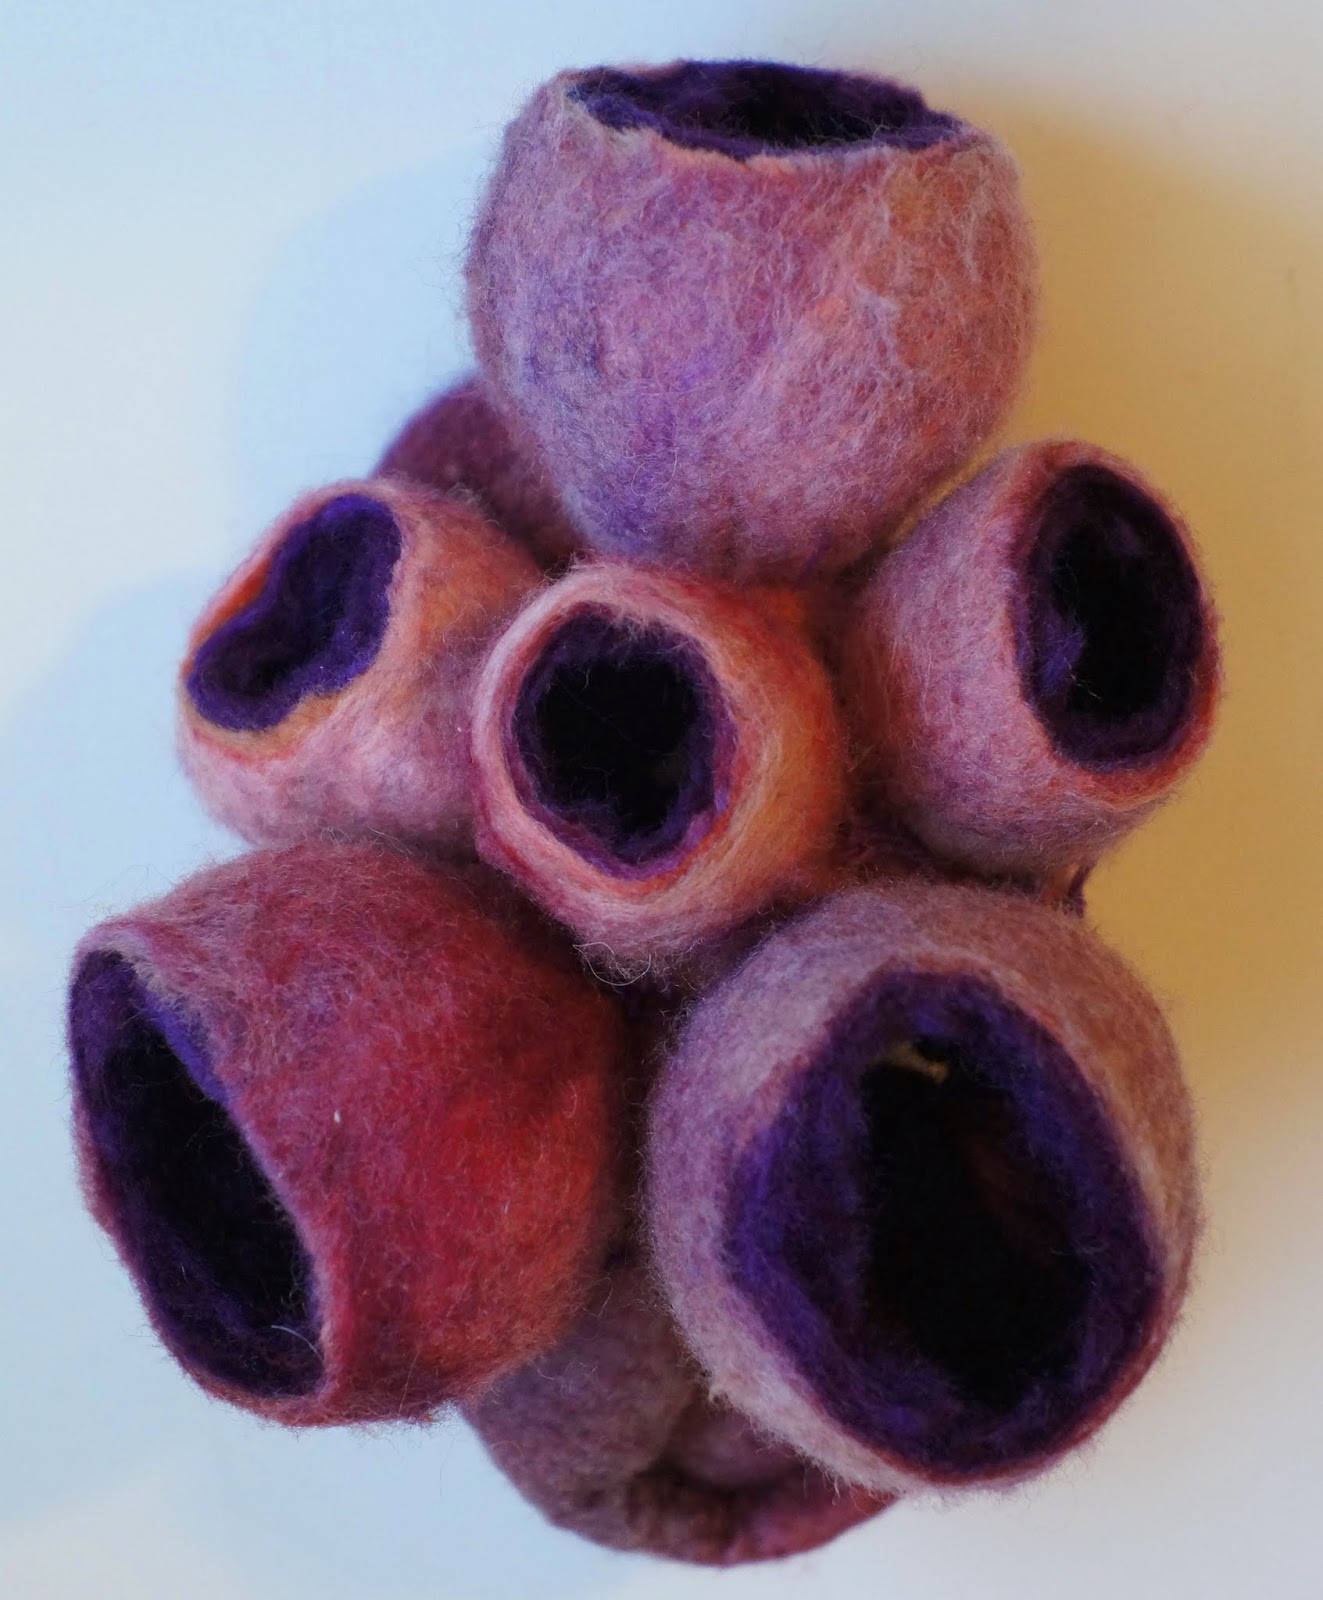
I really liked the felt "bubbles" or "baubles" or whatever they are called. I didn't think they were completely felted and set them aside to try and felt them some more later on before cutting their tops off.

Now that it's been a couple months, I really lost my urge to work on them any more. I went ahead and cut their heads off last night.  They look okay, but the orange one had silk fabric on the inside, which did not felt to the wool.  The purple one has dark purple wool as the inner layer, and it could have felted more as well. I don't think they are too bad for a first try.  I had tied the baubles with cotton embroidery thread, thinking they would be permanently felted into the bauble shape. When I removed one of the pieces of embroidery thread, the opening re-opened.  Another sign that it is probably not felted enough. I will sew the bottoms closed on the back side so I can then remove the embroidery floss.


I just started a multi-week online felting class, so will be posting more felting for the next couple months. The week one sample instructions look really interesting and I am looking forward to working on them.  I better get on it, as week 2 instructions come out on Friday.

Monday, February 2, 2015

Painted Wonder Under

I have been experimenting with painted Wonder Under and foils recently. I had some large sheets of painted Wonder Under and decided to iron them onto fabric without adding any foiling. 


I love how it looks once it's been ironed on.  Now I need to decide what to do next. Fabric collage? Stitching? Both? Maybe I should iron some fabric strips to it too? There are lots of options.


Friday, January 23, 2015

Painted velvet with foil

I played with some velvet, wonder under, and foils a couple weeks ago. I thought I would experiment some more with these.  I decided to use Lumiere paints to stamp circles onto my black velvet.

It took a lot of paint on the stamp for it to stamp well on the velvet. 

I had some leftover painted wonder under circles from my last piece, as well as some long strips.

I ironed these onto the velvet and then partially foiled them.  The Lumiere paints look very muted next to the shiny foils.  I think it looks flat and uninteresting, but I will add some fabrics and see if it can be improved.

Closeup.

Thursday, January 15, 2015

Master bedroom renovation

We finally are getting the final touches done in the renovated basement rooms.

Here is our completed master bedroom.

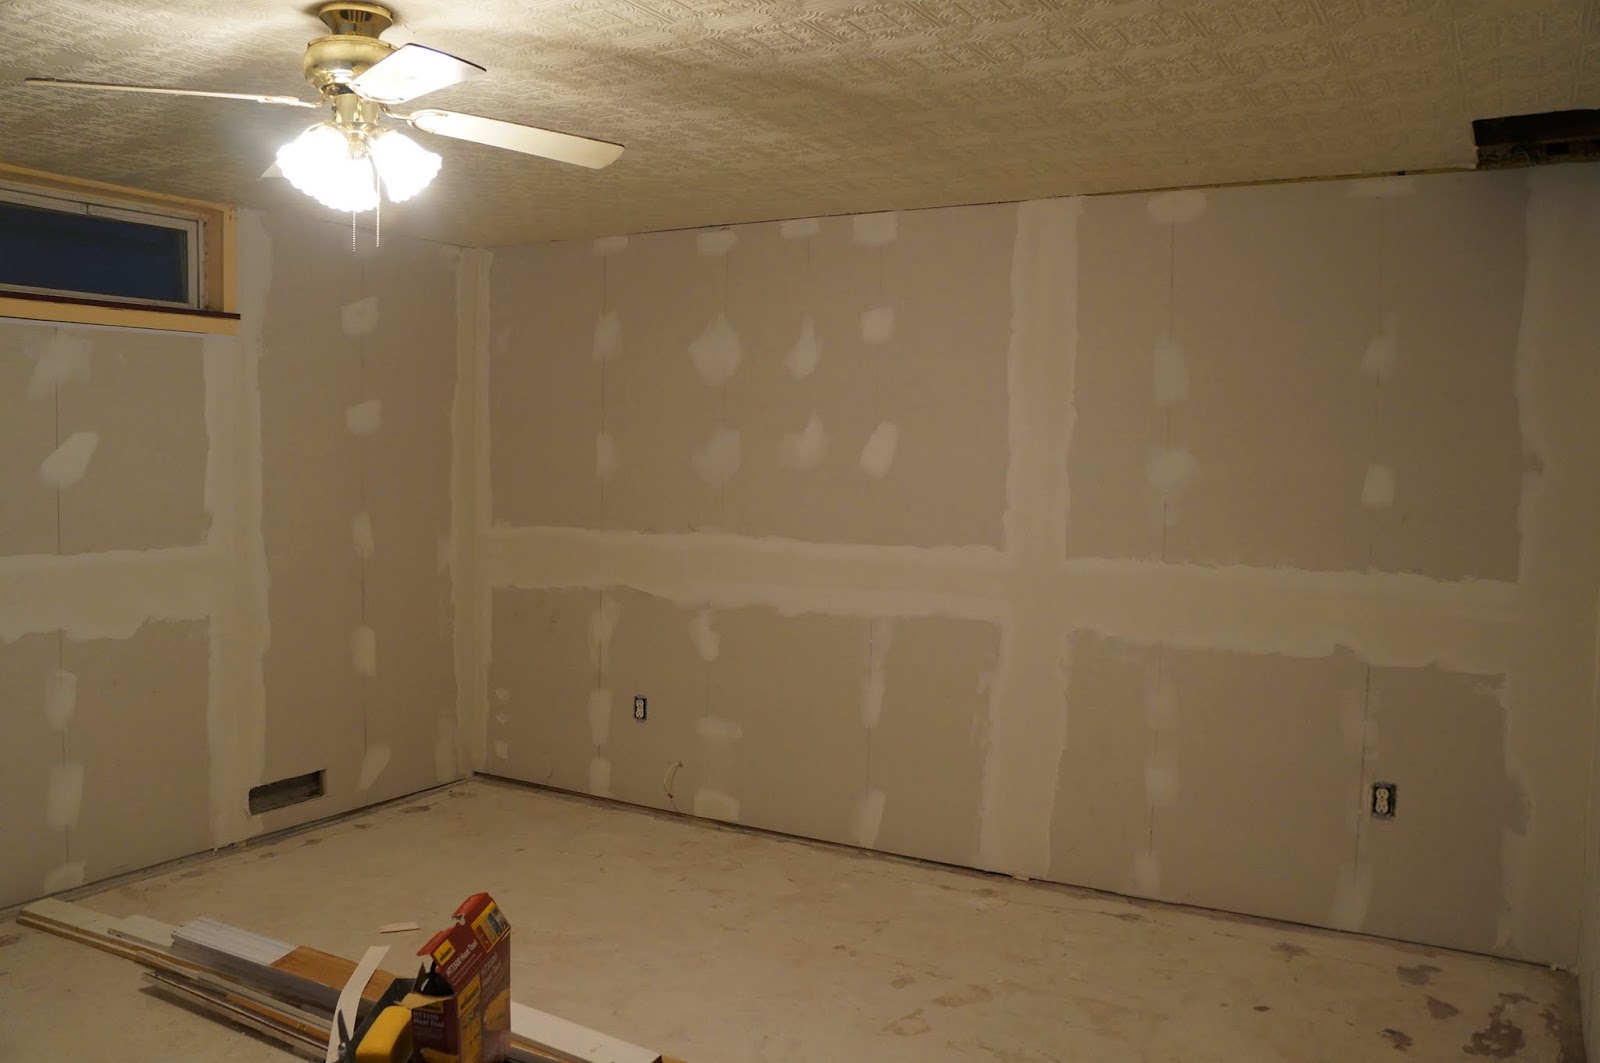
Here is the room before. It really doesn't look much different in these photos, but a lot of work was done. I liked the original paint color, so it is pretty much the same color as before. Most of the original walls had pressboard paneling on them. We had that removed and had it replaced with drywall. We got rid of the ceiling fan, and replaced the flooring, base, and crown trim.


Here you can see that the existing room (beyond, as seen from the basement entryway) was not completely finished. I don't know why this area was not finished.  We actually moved the door to the bedroom to this location. The door was originally down the hall.

After the pressboard was removed.


New drywall.


There is a walk-in closet at one end. Since we moved the entry door, we have to move the entry to the closet as well.


The basement rooms had textured wallpaper on the ceiling. It was in decent shape and we were not up to the task of removing it, nor did we want to replace the drywall on all the ceilings, so in the bedroom (and entryway) we just repainted the ceilings. You can see how the white really makes a difference. Also the previous paint was a bit shiny, and now it is matte.

We replaced the blond laminate floor with click lock vinyl. If water ever gets in the basement, these could be removed, dried off, and reinstalled. Pergo type floors are ruined if they get wet. The only down side is there is no padding under it, so it is rather hard and you can feel the variances in the concrete floor underneath. We also put frosted cling film on the windows, so we have privacy without blocking out the light.


Stenciled felt coasters, art experiment

Art Experiment is a a series of posts using supplies which I own but have rarely (or never) used. Failure or success is not important, it is trying something different and seeing what can come from it.  There are three goals: try something new, use something in my supply stash, and have fun/experiment in the studio.
Finished coasters!

Over a year ago, I was experimenting with using Decolourant on felted recycled wool sweaters.  It didn't go very well. When I rinsed the fabrics after ironing, I could barely see any difference.  I went to a sewing expo and bought some Catch & Release (a product to remove color, which I believe is designed for wool but says it works on cotton too), and some wool felt that a vendor had for sale. The vendor was Crawford Designs and they make the Catch & Release product. These supplies have been sitting in my box of felt ever since (which I believe was last February).


My glass/metal coasters have been falling apart, so I decided to make some new ones.  I took out my wool felt, Catch & Release, some paint, and a stencil with different leaves on it.

I applied the Catch & Release directly to the felt using a makeup sponge to pounce it through the stencil.  After it had dried, I decided to do another layer of stenciling with paint mixed in to the Catch & Release. (If I do this again, I will do the colored ones first, as it was hard to tell where the clear ones were when I was adding the colored ones).  

After these were dry, I ironed the felt.  The clear Catch & Release did a fabulous job at removing the color.  The ones with the paint mixed in look like they were painted on, not like the original color was removed and replaced. I rinsed them with cool water per the directions.

I do like the way the fabrics turned out. I know the last time I tested the Catch & Release on recycled wool sweaters, it did not really work. This was probably because of the type of dye that is used in the sweaters. The dye in the wool felt I bought worked great with the Catch & Release product.

Just FYI, the Catch & Release product is pretty stinky.  It smells like those bathroom disinfectant sprays that add a floral scent, but the chemical smell is still there too. It smells when you apply it and it smells when you iron it, it just downright smells. And I don't have a great sense of smell so it is pretty potent if I am commenting on it. That said, I will use it again and cope with the smell.

After they were rinsed and dried,  I cut 4" squares from the felt.  I sandwiched some foam material between the layers (to help make the coasters somewhat impervious to liquids), stitched around the edges with a straight stitch a 1/4" from the edge, and did some free motion stitching around the leaves. Now I have some lovely coasters!
 
Here is my free-motion stitching on the front (I could use a bit more practice)
Here is the back side. I like the contrast on the back between the printed leaves and the stitched outlines.


I am glad to have new coasters, but am also excited to have this project finished. I started this before Thanksgiving, and between the holidays, traveling, and home renovation projects, they have been sitting on my sewing table half-finished for over a month. Hurrah, onto the next!