George is raw edge pieced, with fused and stitched circles.
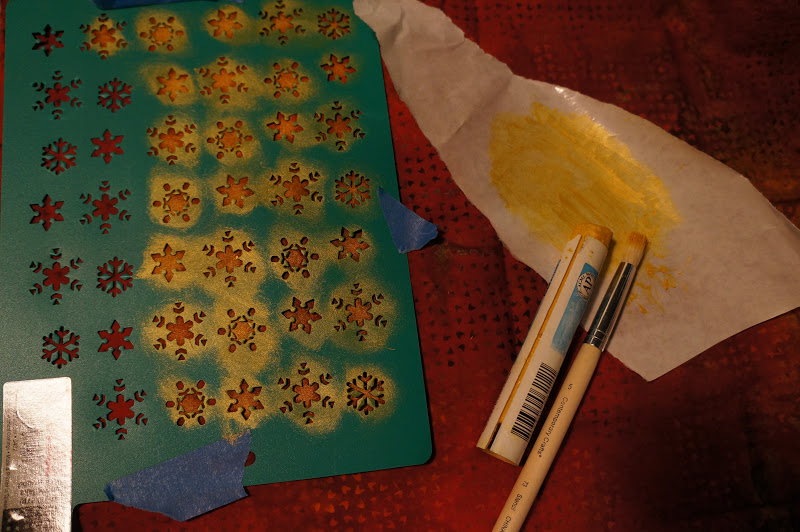
She is mainly recycled fabrics. Her rump is a curtain, you can see the metal grommets for the curtain rod. It was a patterned white-on-white fabric, but I painted the diamond shapes with acrylic paint. In order to get the paints to blend, without bleeding into the unpainted sections, I mixed my acrylic paint with clear aloe vera gel. Below is a picture of what would happen if I had used water instead. The aloe vera worked very well. I did not add anything else to the acrylic paint as it is an art quilt and cannot be machine washed. I did iron the painted sections to help "set" the paint, with a teflon sheet between my iron and the fabric. It did "smoke" a bit and smelled a bit funny, so I turned down the heat a bit to medium high. I do not think this was toxic, but don't take my word on it. I should have put on my respirator.

This fabric (below) was a purchased solid white twill. I stamped the fabric using a washer. You can see the post about stamping this fabric here.

The top white section is a white cotton tablecloth. The colored belly section is a puddle painted piece of polyester sheer curtain. My blogs on puddle painting can be seen here and here (not the same fabric, just the technique).

The fabric that looks like small dots (shown below in the middle and used for some of the legs) is a textured curtain. It was white and I lightly rubbed Shiva paintsticks over it, which only painted the raised parts on the fabric. After letting the fabric sit for a few days, I ironed it to set the colors.

I did have a full size paper "pattern" of the overall cow, but just used that to figure out my piecing.

Once all the pieces were sewn together, I pinned it to some batting and free motion stitched it, outline stitching the patterns on the fabrics.


I came into textile arts from a mixed media background. I will be the first to say that I will not pass any tests regarding having a beautiful back side on my quilt. I did not want to have a binding around the outside edge, and did not want to have to turn down the curved edge of the fabric on the back side, so I used the "pillowcase method" which involves laying the backer fabric face to face with the quilt top, sewing all around but leaving an opening in one section, in order to turn it right-side out. Before turning it, I did add some iron-on stiff interfacing at her head and rump so she would not sag when she was hung. I then turned the quilt right-side out and sewed 1/4" from the outside edge, all around the quilt. This is really too big a quilt to use the pillowcase method, and there are some wrinkles and folds in the backing fabric. But she is a beauty on the front side!